Source: https://www.search3w.com/adding-hebrew-language-to-your-computer-or-laptop/
Adding Hebrew language to your computer or laptop
Several people have asked me recently, “How can I add Hebrew to my Word or PowerPoint documents?”. (You may not know, but I was part of the Microsoft team that wrote the RTL code for its operating system). If you use Microsoft, you have full Hebrew support right now at your fingertips!
Enjoy my easy step-by-step process on how to add Hebrew to your documents, presentations and spreadsheets:
After following my Blog you will be able to do the following:
- Full Bi-directional Writing: right-to-left and left-to-right.
- Switching between English and Hebrew inside a sentence.
- Write Hebrew on any MS Office program, include Word, PowerPoint and Excel.
- Add Hebrew words to your emails.
- Add Nikkud.
If you feel the post was useful, I need small favor from you guys. Please go over my other posts and contribute grammar/better English Comments and Suggestions below the post. TODA!
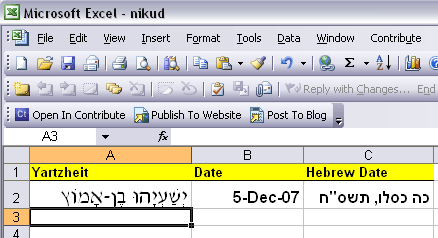
Sample One – Hebrew on Excel (Yartzheit dates)
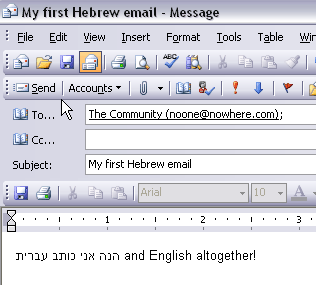
Sample Two – Hebrew on Outlook E-Mail
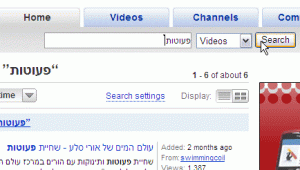
Sample Three – Hebrew on YouTube
INSTRUCTIONS TO ENABLE HEBREW IN WINDOWS
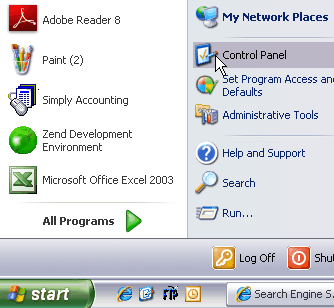
Click START -> CONTROL PANEL
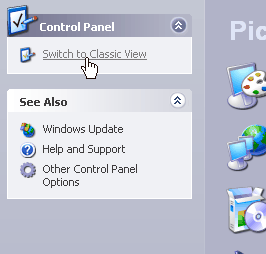
Switch to Classic View
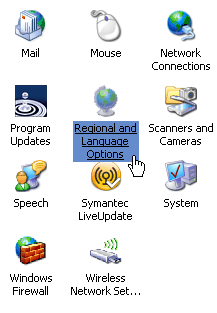
Click on REGIONAL AND LANGUAGE OPTIONS
You may need your Windows CD, so have it handy.
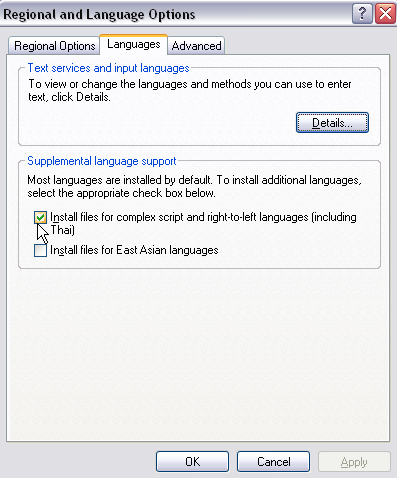
Click on the middle tab “Languages”
In “Supplemental Language Support”, make sure “INSTALL FILES FOR COMPLEX SCRIPT AND RIGHT TO LEFT LANGUAGES is checked.
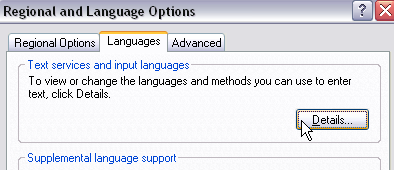
Click on “Details” button
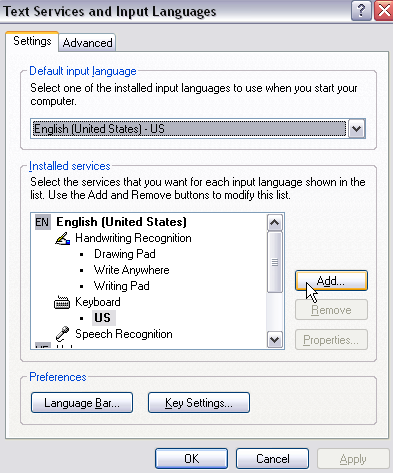
Add the Input Language
“Default Input Language” on top should be ENGLISH (UNITED STATES).
Click on “Add” button
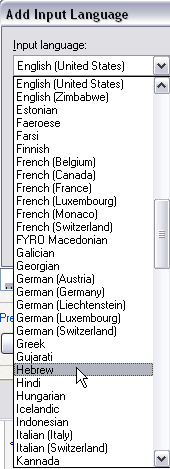
Find Hebrew in the Language List
On the “Add Input Language” Dialogue Box (Input Language) find Hebrew in the listing and press OK.
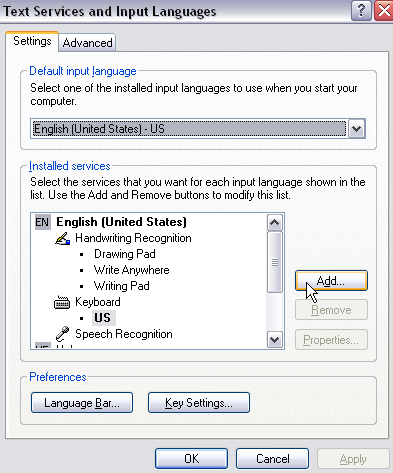
Set your Language Bar
Your “Text Services” box should appear like the diagram on the left with HE Hebrew etc.
Go to “Preferences” on the bottom of the box and click on “Language Bar”.
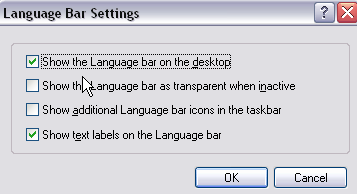
SHOW TEXT LABELS ON THE LANGUAGE BAR
Check the first box SHOW LANGUAGE BAR ON DESKTOP and SHOW TEXT LABELS ON THE LANGUAGE BAR.
Switching between English and Hebrew
You may toggle between English and Hebrew by pressing ALT-SHIFT.
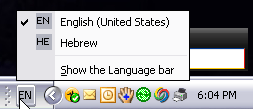
Another way is to click with on the EN or HE icon on the Formatting Toolbar.
If it is not present, click on the down arrow on the last item on the Formatting Toolbar and then ADD OR REMOVE BUTTONS and then choose FORMATTING. Place a check next to EN KEYBOARD LANGUAGE. Do not confuse with another similar sounding item LANGUAGE. (That will indicate the language in use but you cannot switch languages by using it).
If the KEYBOARD LANGUAGE Switch is not found using the above method, go to the TOOLS menu and choose CUSTOMIZE. Using the COMMANDS tab (2nd tab), go to FORMAT and find EN KEYBOARD LANGUAGE in the right side box. Highlight it and then drag it to the top toolbar.
Maintaining Correct Typing when Switching Languages
To Switch from English to Hebrew (when using Left to Right orientation)
….when you type the last letter in English, press space while still in English and then switch to HE (Hebrew) by method 1 or 2 above and continue typing in Hebrew. Since this sentence is basically an English sentence (LTR) to place a period, switch to EN and type the (English) period (on key top is >).
When switching from Hebrew to English (when using Left to Right orientation).when you reach the last letter in Hebrew, switch to EN (English) by method 1 or 2 and press space, (English) comma or period and continue typing in English. Put an English period to end the sentence.
To switch from Hebrew to English (when using Right to Left orientation)
…when you type the last letter in Hebrew, press space while still in Hebrew and then switch to EN (English) by method 1 or 2 above and continue typing in English. Since this sentence is basically a Hebrew sentence (RTL) to place a period, switch to HE and type the (Hebrew) period (on key top is ?).
When switching from English to Hebrew (when using Right to Left orientation)
….when you reach the last letter in English, switch to HE by method 1 or 2 and then press space, (Hebrew) comma or period and continue typing in Hebrew. Put a Hebrew period to end the sentence.
Hebrew Vowels Nikud
For the most part, vowels are not used (“ketiv Maleah” usually makes words recognizable). You can, however, place Hebrew vowels in their proper places by using the method described below. Although it can be done after typing each letter, it is easier to do it after all the letters were typed.
1. Type all your text without vowels
2. Place your cursor after the first letter at the beginning of the document
3. Press CAPS LOCK and SHIFT KEY together. You may activate CAPS LOCK and then you only need to hold the SHIFT KEY.
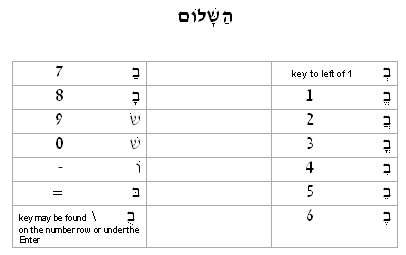
4. The row with the number keys (only one exception) contain’s the vowels according to the table below
5. When you finished typing the vowel for the first letter release the SHIFT KEY, use the arrow key to advance to the end of the next letter –repeat steps 3 and 4 etc.
6. If you are using a RTL orientation, use the left arrow key; if you are using a LTR orientation, use the right arrow key.
7. When typing a letter with several nikkud entries, do it in the following order: first put in the Dagesh (if required), the Cholam Haser or the indicator for ? and then the vowel. (i.e., in the word below, after typing the Patach under the Hey, move the cursor to the Shin- place the Dagesh Hazak, put the right mark over the Shin and then type the Kamatz.
Using On Screen Keyboard (Hebrew or English)

Using On Screen Keyboard (Hebrew or English):
• To open On-Screen Keyboard, click Start, point to All Programs, point to Accessories, point to Accessibility, and then click On-Screen Keyboard.
• The program in which you want to type characters must be active while you are using On-Screen Keyboard. Also be sure the cursor is showing (blinking) in the document where you want to type text.
• To change languages click the EN or HE icon on the Formatting Toolbar. When you move the mouse pointer over the keyboard, the pointer will become a hand shape and the characters will change to the appropriate language
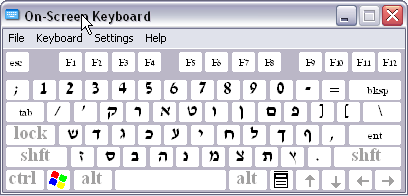
• When using the On-screen keyboard, it is advisable not to use ALT-SHIFT to change languages. Also, the on-line keyboard must be in lower case English letters before you can switch to Hebrew.
On-Screen Keyboard has several typing modes you can use to type data. The 2 most useful are:
• In clicking mode, you click the on-screen keys to type text.
• In hovering mode, you use a mouse or joystick to point to a key for a predefined period of time, and the selected character is typed automatically.
• Use Click Sound to add an audible click when you select a key.
• Use Always on Top to keep your keyboard displayed on your screen when you switch programs or windows
On Linux Ubuntu
Get a Hebrew keyboard by going to the “settings” menu and clicking on “Region and Language” tab. Then adding a Language by clicking the plus sign like this:
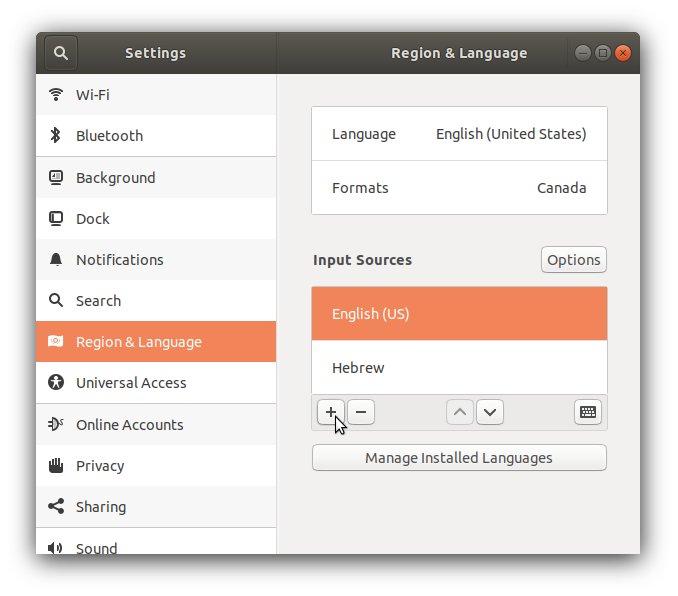
Then click on the top right to toggle the language when you want to use it:


